Freeview
Copied from
http://en.wikipedia.org/wiki/Freeview_(New_Zealand)
On May 2, 2007, Freeview's satellite television transmissions were turned on for the first time to the general public.
Freeview
(sometimes incorrectly spelt FreeView) is a non-profit service, providing free-to-air digital television and radio to New Zealand.
Freeview is available via satellite television to the whole of New Zealand. Freeview will also be available via digital terrestrial television, covering 75% of New Zealand, from early 2008.
Freeview has been designed to eliminate the bad reception caused by New Zealand's rugged topography, and provide New Zealanders with crystal clear digital television and radio. Freeview will also provide more channels for people to choose from, high resolution video and improved sound quality, and interactive content. This will prepare New Zealand for analogue switchoff, planned for some time between 2013 and 2017[1].
A set-top box, a suitable TV tuner card or a digital capable TV, and an UHF aerial or a satellite dish, is required to receive Freeview. At current, two manufacturers who helped to make the EPG for Freeview, Zinwell and Hills, have exclusive rights to mark their products with the "Freeview tick", meaning that they are certified. Receivers with the Freeview tick cost between NZ$280 and NZ$300, however uncertified generic DVB receivers costing as little NZ$150 are available.
Freeview uses the DVB-S and DVB-T standards on government provided spectrum. The government will also pay $25 million, about one third of the total cost.
History
Sky Television launched New Zealand's first digital television service in December 1998. Until the launch of Freeview, Sky has held the monopoly for digital satellite television.
On June 15, 2006 it was announced that a free-to-air digital television service called Freeview would be available via satellite transmissions from mid-2007 and terrestrial transmissions from mid-2008.
On April 23, 2007, Freeview's marketing campaign was launched. The campaign saw the Freeview website coming online, and a series of four television adverts being shown on Freeview's shareholders' channels, using the slogan "Make bad reception a thing of the past", and showing people using unusual items and ways to get television reception.
On May 2, 2007, Freeview's satellite television transmissions were turned on for the first time to the general public.
On May 18, 2007, Freeview's first digital-only channel launched: a temporary channel from TVNZ, providing coverage of the V8 Supercars.
Currently on the Freeview platform, there are 5 television channels and 2 radio stations. Presently, TVNZ, CanWest, the Māori Television Service, and Radio New Zealand supply content.
Up to 18 channels will be available, with six each assigned to TVNZ and CanWest, and the remaining six[3] assigned to other networks. [2] Giving that TVNZ's and CanWest's current free-to-air channels will be available on Freeview, they will each have four extra channels available.
Freeview also has its own eight-day electronic programme guide, named Freeview EPG. TVNZ's Teletext service is also available.[4]
Current Television Channels
TV One
TV2
TV3
C4
Māori Television
One Sport Extra -
Current Radio Stations
Radio New Zealand National
Radio New Zealand Concert
Temporary Channels
TVNZ had announced a channel especially for the V8 Supercars in 2007. From Round 4, which begins on May 18, One Sports Extra will be broadcast on channel 20 and will bring the races live and uninterrupted.
Other Networks
Another two companies have stated they will participate in the Freeview venture:
Alt TV and an unspecified independent broadcaster rumoured to be Triangle TV.
There are ongoing negotiations with Prime, other regional TV operators, and overseas companies wanting to start up in New Zealand.
Freeview will be open to other free-to-air broadcasters if they want to join.
Prime has said it will definitely not make a decision before 2008. Also, Prime's contracts with sports bodies preclude it from broadcasting sports programmes unencrypted on satellites, so Prime may only be available via terrestrial transmissions if it decides to join Freeview.
The New Zealand Racing Board originally showed interest, but currently has withdrawn as a shareholder, but may join at a later date.
Future Content
With 11 spare channels available, several new digital-only television channels will be launched within the next two years.
TVNZ will produce two new channels, one each in 2007 and 2008. One will be a commercial-free news, sport and information-based channel with 90% local content, tentatively titled TVNZ News 24. The other will screen preschool, family, and arts programmes, and has been tentatively titled TVNZ3.
CanWest confirmed it will produce one extra channel each in 2007 and 2008 targeting a niche market. The BSA expects it to screen imported programmes on its first extra channel.Since CanWest will not use all six channels allocated to it, it may sub-lease the spare capacity to other companies. As of April 11, CanWest has made the transition from 4:3 broadcasting to 16:9 (on TV3), and on May 2nd C4 followed suit.
Māori TV aims to launch more channels later.
Parliament will get its own channel ("Parliament TV") soon.
Although the satellite and the terrestrial service will both have 18 channels initially, there is space for only 20 channels on the satellite transponder so fewer channels may be available on satellite than terrestrial in the future.
Quality
“ The quality [of the signal] will be stunning. People wouldn't recognise it.… It's not what you get on Sky now, it's much better. ”
—Rick Freisen
COO of CanWest TVWorks
Satellite transmissions will be broadcast in 576i, as the satellite transponder is not high definition capable. However, terrestrial transmissions can be broadcast in high definition, and the government will let the broadcasters decide whether to broadcast in high definition or continue in standard definition. TVNZ does not currently have plans on HDTV, and will keep to SDTV. Prime, if it joins, will broadcast in high definition.
Technology
Freeview uses the satellite Optus D1 to broadcast via satellite. It uses a transponder, leased from Kordia.
UHF terrestrial broadcasting will be introduced in May 2008, and will initially cover 75% of New Zealand's population. Freeview's terrestrial transmissions will be broadcast from Kordia's existing transmitter towers. Eventually, terrestrial transmission may reach 92% of the population.[2]
Freeview uses the DVB standard, as standardised in 2001 with NZS6610:2001. DVB is used mainly due to New Zealand's rugged topography, meaning multipath was inevitable. ATSC cannot handle multipath well, so it was not chosen.
TVNZ said digital terrestrial will be broadcast in MPEG4 and satellite broadcasts will be in MPEG2. This means people who took part in the Auckland digital trial using terrestrial DVB-T MPEG2 receivers will need to change their receivers to DVB-T MPEG4 to receive terrestrial Freeview once officially launched in May 2008.
Freeview certifies set-top boxes but doesn't sell them - this is up to electronics retailers. Freeview certification centres on the localisation of multimedia data. This data is broadcast over DVB using the MHEG-5 standard. At the moment this is only used to transmit EPG data.
Freeview is currently discussing with Telecom about the provision of IPTV over ADSL.
Finance
The government will pay up to NZ$25 million and provide free radio spectrum, estimated to be worth up to NZ$10 million, during the transition to digital. The companies involved will pay the remaining $50 million. The government claims a NZ$230 million benefit to the economy. This is the second digital TV system attempted by the government. The first attempt in 2000 wasted NZ$6.8 million. Freeview may turn into for-profit after the analogue switch off.
It will cost Alt TV NZ$600,000 a year to broadcast on Freeview. Canterbury TV estimates it will need to pay NZ$1 million a year if it joins FreeView.
Competition
Sky currently has a free-to-air package where channels similar to the ones available on Freeview are available for a monthly fee of NZ$18.29, plus an installation fee of NZ$99.[18] Around 90,000 people use this service, generally by people who cannot get a high quality signal from analogue terrestrial television.[8] However, as only twenty channels are available on the satellite for Freeview, and presently there are fewer channels on Freeview than Sky, Sky is relatively unaffected. A Sky dish can be used to receive Freeview but a separate set-top box will be required.
More info
Offical web site
http://www.freeviewshop.co.nz/channels.html
forum
http://groups.yahoo.com/group/Freeview_nz/
Wiki
http://en.wikipedia.org/wiki/Freeview_(New_Zealand)
www.apsattv.com
www.vetrun.com .
http://www.freetv.co.nz/freeview.html
27 May, 2007


24 March, 2007
Human Slingshot
Somewhere in the usa
http://www.youtube.com/watch?v=7Sd5G2EcOvQ
A couple more
http://www.ifilm.com/video/2821107
http://www.guardian.co.uk/uk_news/story/0,3604,1605521,00.html
Stuntman Becomes 'Human Slingshot'
http://keyetv.com/video/?id=11144@keye.dayport.com
http://www.youtube.com/watch?v=7Sd5G2EcOvQ
A couple more
http://www.ifilm.com/video/2821107
http://www.guardian.co.uk/uk_news/story/0,3604,1605521,00.html
Stuntman Becomes 'Human Slingshot'
http://keyetv.com/video/?id=11144@keye.dayport.com
16 March, 2007

The ultimate boy's Toy.
A 22-year-old has invented the Ultimate boy's toy.
It took John Cornwell about 150 hours and $400 in parts to modify a mini-fridge common to many college dorm rooms into the beer-tossing contraption, which can launch 10 cans of beer from its magazine before needing a reload.
With a click of the remote, fashioned from a car's keyless entry device, a small elevator inside the refrigerator lifts a beer can through a hole and loads it into the fridge's catapult arm. A second click fires the device, tossing the beer up to 20 feet — "far enough to get to the couch," he said.
More here
http://abcnews.go.com/US/wireStory?id=2933766
The Video
The Hole - video powered by Metacafe
23 February, 2007
Part 4 Shareaza
Shareaza is a peer-to-peer client for Windows that allows you to download any file-type found on several popular P2P networks.
Shareaza is FREE & contains NO Spyware or third-party products.
Download
http://www.shareaza.com/?id=download
how to install etc
http://wiki.shareaza.com/static/QuickGuide
Info
http://wiki.shareaza.com/static/
This page has quick guides on Setting up plus Trouble Shooting.
http://www.kadusa.com/shareaza/eng/index.htm
More usefull links
http://www.zeropaid.com/bbs/shareaza/t-useful-links-for-shareaza-28210.html
Shareaza is FREE & contains NO Spyware or third-party products.
Download
http://www.shareaza.com/?id=download
how to install etc
http://wiki.shareaza.com/static/QuickGuide
Info
http://wiki.shareaza.com/static/
This page has quick guides on Setting up plus Trouble Shooting.
http://www.kadusa.com/shareaza/eng/index.htm
More usefull links
http://www.zeropaid.com/bbs/shareaza/t-useful-links-for-shareaza-28210.html
12 February, 2007
Part 3: Quick Launch
Quick Launch
If you are constantly opening certain programs and want quick access to them launch them from the Quick Launch Bar.
This is along side the start button. If it is Blank as in fig: 1a http://snipurl.com/19x9e You want it to look like Fig:A http://snipurl.com/19x9e
Right Click anywere on the Start Button and select properties.http://snipurl.com/19x9d
Click Taskbar top left put a tick in the Quick Launch tick box click apply then o.k.
Beside the clock you will now have icons for Internet Explorer, Show Desktop, Windows Media Player.
To add any new shortcuts for your favorite programs. Right click a blank area of this taskbar and tick lock the taskbar. Have the desktop showing or the shortcut Icon for the program you want on the Quick Launch bar. click on the Icon and Drag it to the Bar ,A black line will appear where the icon will stay, release the icon . Repeat this step for everything you want on the Bar.
If you have too many icons on there you can drag a empty folder on to it and put Shortcuts in there to free up some space. Right click the taskbar again and click lock the task bar.
Note
The icons on the quick launch bar are only short cuts to the Actual programs
Tip
If you see chevrons like these >> click on them to see Hidden Icons
If you are constantly opening certain programs and want quick access to them launch them from the Quick Launch Bar.
This is along side the start button. If it is Blank as in fig: 1a http://snipurl.com/19x9e You want it to look like Fig:A http://snipurl.com/19x9e
Right Click anywere on the Start Button and select properties.http://snipurl.com/19x9d
Click Taskbar top left put a tick in the Quick Launch tick box click apply then o.k.
Beside the clock you will now have icons for Internet Explorer, Show Desktop, Windows Media Player.
To add any new shortcuts for your favorite programs. Right click a blank area of this taskbar and tick lock the taskbar. Have the desktop showing or the shortcut Icon for the program you want on the Quick Launch bar. click on the Icon and Drag it to the Bar ,A black line will appear where the icon will stay, release the icon . Repeat this step for everything you want on the Bar.
If you have too many icons on there you can drag a empty folder on to it and put Shortcuts in there to free up some space. Right click the taskbar again and click lock the task bar.
Note
The icons on the quick launch bar are only short cuts to the Actual programs
Tip
If you see chevrons like these >> click on them to see Hidden Icons
08 February, 2007
Part 2 Saving Downloading.
Part 2
Saving or downloading.
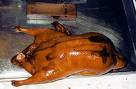
Step 1 We will learn how to save a image from the internet,
Go to http://snipurl.com/19jqe and right click on the image and select save picture as.
A dialog box should appear,
Fig: 9 http://snipurl.com/19peu
On the right hand side of where it says Save in you should see a downward pointing arrow, click on the downward pointing arrow and a drop down menu should appear,Fig: 10
http://snipurl.com/19pos
Select My Documents
At the bottom of the dialog box Click in the File Name box and name the file Duck
Then click Save.
click the start button then My Documents. now you should see the Image "Duck" you saved .
Go back to http://snipurl.com/19jqe.
Right click the image again and select Save Picture as "Now Find the Folder you created in part 1". In the Save in Field Click this folder when you find it. Name the File Duck 2 click Save.
Click the start button then My Computer go to the drive where you created the folder in Part 1 and open it.
You should have 2 Duck images in there "Duck & Duck2"
Now every time you save something . It should save to this folder.
Note
It always pays to keep an eye on this Dialog box "Save in" or "Look In". Just to make sure it is still pointing to the folder you made.
Tip.
If you happen to save a file and you can not find it. Save another file and take a note of where "Save in " or "Look in" is pointing too. This is where your lost file will be.
There are a lot of different ways you can save something to your computer.
For example you are looking at a Web Page in Internet explorer., and you want to keep the page so you can look at it later.
Step 1
Click File on the top menu bar, Fig:11 http://snipurl.com/19pi6
Step 2
Then select save as, Fig:12 http://snipurl.com/19pif
Step 3
Then select Web Archive,single file(*.mht) fig:13 http://snipurl.com/19pii
This will save the page as a single file . You can rename it whatever you like or keep the original name.
Tip
"Look at the Save in box to see where you are saving it too".
If the web page has a lot of pages instead of saving each page individually you can use a web site copier to download the whole web site.
HTTrack is a good one .
Manual
http://www.httrack.com/html/index.html
DownLoad
http://www.httrack.com/page/2/en/index.html
http://www.httrack.com/
Just copy and paste the web site address into it and away it goes.
To download software to your computer ,it pays to get a program to do it for you.
These programs can resume downloads when your internet connection fails. Allow multiplie downloads etc. A good one is
Download Express
Features
HTTP, FTP, HTTPS protocol support
Cookies support
Very fast and reliable file retrieval from the Web and FTP sites
Maximum Internet connection bandwidth usage when loading several file parts simultaneously
HTTP and SOCKS Proxy support
Internet Explorer clicks interception
Checks downloaded files for viruses
Can operate in the background
The ability to resume broken downloads
Very easy to use More Info
http://www.metaproducts.com/mp/mpProducts_Detail.asp?id=18
Online user Manual with Screen Shots
http://www.metaproducts.com/mp/DE_concise.asp?id=18
Download
http://www.metaproducts.com/mp/MetaProducts_Download_Express.htm
When you first install it it asks you where you want to save your downloads to . point it too the folder you made in part 1.
Saving or downloading.
Step 1 We will learn how to save a image from the internet,
Go to http://snipurl.com/19jqe and right click on the image and select save picture as.
A dialog box should appear,
Fig: 9 http://snipurl.com/19peu
On the right hand side of where it says Save in you should see a downward pointing arrow, click on the downward pointing arrow and a drop down menu should appear,Fig: 10
http://snipurl.com/19pos
Select My Documents
At the bottom of the dialog box Click in the File Name box and name the file Duck
Then click Save.
click the start button then My Documents. now you should see the Image "Duck" you saved .
Go back to http://snipurl.com/19jqe.
Right click the image again and select Save Picture as "Now Find the Folder you created in part 1". In the Save in Field Click this folder when you find it. Name the File Duck 2 click Save.
Click the start button then My Computer go to the drive where you created the folder in Part 1 and open it.
You should have 2 Duck images in there "Duck & Duck2"
Now every time you save something . It should save to this folder.
Note
It always pays to keep an eye on this Dialog box "Save in" or "Look In". Just to make sure it is still pointing to the folder you made.
Tip.
If you happen to save a file and you can not find it. Save another file and take a note of where "Save in " or "Look in" is pointing too. This is where your lost file will be.
There are a lot of different ways you can save something to your computer.
For example you are looking at a Web Page in Internet explorer., and you want to keep the page so you can look at it later.
Step 1
Click File on the top menu bar, Fig:11 http://snipurl.com/19pi6
Step 2
Then select save as, Fig:12 http://snipurl.com/19pif
Step 3
Then select Web Archive,single file(*.mht) fig:13 http://snipurl.com/19pii
This will save the page as a single file . You can rename it whatever you like or keep the original name.
Tip
"Look at the Save in box to see where you are saving it too".
If the web page has a lot of pages instead of saving each page individually you can use a web site copier to download the whole web site.
HTTrack is a good one .
Manual
http://www.httrack.com/html/index.html
DownLoad
http://www.httrack.com/page/2/en/index.html
http://www.httrack.com/
Just copy and paste the web site address into it and away it goes.
To download software to your computer ,it pays to get a program to do it for you.
These programs can resume downloads when your internet connection fails. Allow multiplie downloads etc. A good one is
Download Express
Features
HTTP, FTP, HTTPS protocol support
Cookies support
Very fast and reliable file retrieval from the Web and FTP sites
Maximum Internet connection bandwidth usage when loading several file parts simultaneously
HTTP and SOCKS Proxy support
Internet Explorer clicks interception
Checks downloaded files for viruses
Can operate in the background
The ability to resume broken downloads
Very easy to use More Info
http://www.metaproducts.com/mp/mpProducts_Detail.asp?id=18
Online user Manual with Screen Shots
http://www.metaproducts.com/mp/DE_concise.asp?id=18
Download
http://www.metaproducts.com/mp/MetaProducts_Download_Express.htm
When you first install it it asks you where you want to save your downloads to . point it too the folder you made in part 1.
07 February, 2007
How to make a New Folder
This is of a series of Tutorials I am putting together to help a Couple of people who are new to computers and want to know how to do certain things . I will be trying to keep them simple and provide as many screen shots as possible . if you find a mistake or know of a easier way to do something or have a suggestion.
"Please feel free to leave a comment".
I am going to start of with
Part 1
Creating a Folder for all your Files .ie: anything you store or save on your computer
Part 2
Downloading and saving files. be it Pictures, Music ,Emails or just your notes etc.
part 3 will be a short one on the Quick Launch Bar to aid getting around your computer
Part 4 Shareza file sharing. Downloading Songs
Part 5 Email . Saving,Moving Store Folder. Forwarding etc.
-------------------------------------------------------------------------------------
Part: 1
This Tutorial is to try and explain how to make a Folder for storing all your files and Point windows to it.
This is most important for 2 reasons
N# 1 When you save or Download something you will be able to find it again
N# 2 "when" not if Windows ever crashes on you. you will be able to save your files easier.
Note:
Most computers hard drives have been parttioned into 2 separate areas one having the operating system. the other for your personal files.
The drive with the windows folder in it is the one you should avoid using if at all possible.
note to see The pictures ie: Fig:1 ,2, 3,4,5,6,7,8 etc scroll down this page.
Step 1.
click the start button.
Fig:1
Step 2.
click My computer
Fig:2
Step 3.
Double click your hard drive that you want to save all your downloaded or saved files in.
Fig: 3
On the File and Folder Tasks menu on the left click "Make a new Folder"
Name this Folder "DownLoads" or whatever pleases you.
Open this folder by double clicking on it.
Step: 4
We now have to configure this folder for the next step. At the very top of this folder There should be a Menu bar and a Address bar like the picture below.
fig: 5
If the address bar is not present , right click any where on the menu bar, Click the address bar so it is highlighted,
The address bar will appear under the menu bar. In this bar it should read D:\downloaded or whatever your Drive is named.
Fig:6
If this is not displayed click tools on the Menu Bar and select Folder Options,then View.
scroll down to "Display the full path in the address bar" Put a tick in the box beside it.
Fig :7
Step: 5
Click inside the address bar to highlight the address of the folder . Right click and select copy.
Step:6
Click the start button again and then Right Click My Docments and click Properties.
This will bring up a Dialog box as in Fig:6.
Right Click in the Target box to Highlight the address and click Paste.
Fig: 8
In the Move Documents box, click Yes to move your documents to the new location,
Now you have a folder where everything should be saved too. Which makes it Easier to Find things. In this folder you will find that windows has moved My Pictures,
My Music,My Video Folders. you can now make new folders for anything you want. ie: HouseHold, Car, Bank etc etc.Then make new folders within these folders for example.
In the Household Folder you can make new folders and name the Rates, Phone, power, etc etc.
Note you can Name this folder and any other folder anything you want.
When you first create the folder name it straight away when it is Highlighted or later by right clicking it and selecting rename.
Next Part 2
Downloading and saving .
"Please feel free to leave a comment".
I am going to start of with
Part 1
Creating a Folder for all your Files .ie: anything you store or save on your computer
Part 2
Downloading and saving files. be it Pictures, Music ,Emails or just your notes etc.
part 3 will be a short one on the Quick Launch Bar to aid getting around your computer
Part 4 Shareza file sharing. Downloading Songs
Part 5 Email . Saving,Moving Store Folder. Forwarding etc.
-------------------------------------------------------------------------------------
Part: 1
This Tutorial is to try and explain how to make a Folder for storing all your files and Point windows to it.
This is most important for 2 reasons
N# 1 When you save or Download something you will be able to find it again
N# 2 "when" not if Windows ever crashes on you. you will be able to save your files easier.
Note:
Most computers hard drives have been parttioned into 2 separate areas one having the operating system. the other for your personal files.
The drive with the windows folder in it is the one you should avoid using if at all possible.
note to see The pictures ie: Fig:1 ,2, 3,4,5,6,7,8 etc scroll down this page.
Step 1.
click the start button.
Fig:1
Step 2.
click My computer
Fig:2
Step 3.
Double click your hard drive that you want to save all your downloaded or saved files in.
Fig: 3
On the File and Folder Tasks menu on the left click "Make a new Folder"
Name this Folder "DownLoads" or whatever pleases you.
Open this folder by double clicking on it.
Step: 4
We now have to configure this folder for the next step. At the very top of this folder There should be a Menu bar and a Address bar like the picture below.
fig: 5
If the address bar is not present , right click any where on the menu bar, Click the address bar so it is highlighted,
The address bar will appear under the menu bar. In this bar it should read D:\downloaded or whatever your Drive is named.
Fig:6
If this is not displayed click tools on the Menu Bar and select Folder Options,then View.
scroll down to "Display the full path in the address bar" Put a tick in the box beside it.
Fig :7
Step: 5
Click inside the address bar to highlight the address of the folder . Right click and select copy.
Step:6
Click the start button again and then Right Click My Docments and click Properties.
This will bring up a Dialog box as in Fig:6.
Right Click in the Target box to Highlight the address and click Paste.
Fig: 8
In the Move Documents box, click Yes to move your documents to the new location,
Now you have a folder where everything should be saved too. Which makes it Easier to Find things. In this folder you will find that windows has moved My Pictures,
My Music,My Video Folders. you can now make new folders for anything you want. ie: HouseHold, Car, Bank etc etc.Then make new folders within these folders for example.
In the Household Folder you can make new folders and name the Rates, Phone, power, etc etc.
Note you can Name this folder and any other folder anything you want.
When you first create the folder name it straight away when it is Highlighted or later by right clicking it and selecting rename.
Next Part 2
Downloading and saving .
Subscribe to:
Posts (Atom)