Shareaza is a peer-to-peer client for Windows that allows you to download any file-type found on several popular P2P networks.
Shareaza is FREE & contains NO Spyware or third-party products.
Download
http://www.shareaza.com/?id=download
how to install etc
http://wiki.shareaza.com/static/QuickGuide
Info
http://wiki.shareaza.com/static/
This page has quick guides on Setting up plus Trouble Shooting.
http://www.kadusa.com/shareaza/eng/index.htm
More usefull links
http://www.zeropaid.com/bbs/shareaza/t-useful-links-for-shareaza-28210.html
23 February, 2007


12 February, 2007
Part 3: Quick Launch
Quick Launch
If you are constantly opening certain programs and want quick access to them launch them from the Quick Launch Bar.
This is along side the start button. If it is Blank as in fig: 1a http://snipurl.com/19x9e You want it to look like Fig:A http://snipurl.com/19x9e
Right Click anywere on the Start Button and select properties.http://snipurl.com/19x9d
Click Taskbar top left put a tick in the Quick Launch tick box click apply then o.k.
Beside the clock you will now have icons for Internet Explorer, Show Desktop, Windows Media Player.
To add any new shortcuts for your favorite programs. Right click a blank area of this taskbar and tick lock the taskbar. Have the desktop showing or the shortcut Icon for the program you want on the Quick Launch bar. click on the Icon and Drag it to the Bar ,A black line will appear where the icon will stay, release the icon . Repeat this step for everything you want on the Bar.
If you have too many icons on there you can drag a empty folder on to it and put Shortcuts in there to free up some space. Right click the taskbar again and click lock the task bar.
Note
The icons on the quick launch bar are only short cuts to the Actual programs
Tip
If you see chevrons like these >> click on them to see Hidden Icons
If you are constantly opening certain programs and want quick access to them launch them from the Quick Launch Bar.
This is along side the start button. If it is Blank as in fig: 1a http://snipurl.com/19x9e You want it to look like Fig:A http://snipurl.com/19x9e
Right Click anywere on the Start Button and select properties.http://snipurl.com/19x9d
Click Taskbar top left put a tick in the Quick Launch tick box click apply then o.k.
Beside the clock you will now have icons for Internet Explorer, Show Desktop, Windows Media Player.
To add any new shortcuts for your favorite programs. Right click a blank area of this taskbar and tick lock the taskbar. Have the desktop showing or the shortcut Icon for the program you want on the Quick Launch bar. click on the Icon and Drag it to the Bar ,A black line will appear where the icon will stay, release the icon . Repeat this step for everything you want on the Bar.
If you have too many icons on there you can drag a empty folder on to it and put Shortcuts in there to free up some space. Right click the taskbar again and click lock the task bar.
Note
The icons on the quick launch bar are only short cuts to the Actual programs
Tip
If you see chevrons like these >> click on them to see Hidden Icons
08 February, 2007
Part 2 Saving Downloading.
Part 2
Saving or downloading.
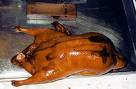
Step 1 We will learn how to save a image from the internet,
Go to http://snipurl.com/19jqe and right click on the image and select save picture as.
A dialog box should appear,
Fig: 9 http://snipurl.com/19peu
On the right hand side of where it says Save in you should see a downward pointing arrow, click on the downward pointing arrow and a drop down menu should appear,Fig: 10
http://snipurl.com/19pos
Select My Documents
At the bottom of the dialog box Click in the File Name box and name the file Duck
Then click Save.
click the start button then My Documents. now you should see the Image "Duck" you saved .
Go back to http://snipurl.com/19jqe.
Right click the image again and select Save Picture as "Now Find the Folder you created in part 1". In the Save in Field Click this folder when you find it. Name the File Duck 2 click Save.
Click the start button then My Computer go to the drive where you created the folder in Part 1 and open it.
You should have 2 Duck images in there "Duck & Duck2"
Now every time you save something . It should save to this folder.
Note
It always pays to keep an eye on this Dialog box "Save in" or "Look In". Just to make sure it is still pointing to the folder you made.
Tip.
If you happen to save a file and you can not find it. Save another file and take a note of where "Save in " or "Look in" is pointing too. This is where your lost file will be.
There are a lot of different ways you can save something to your computer.
For example you are looking at a Web Page in Internet explorer., and you want to keep the page so you can look at it later.
Step 1
Click File on the top menu bar, Fig:11 http://snipurl.com/19pi6
Step 2
Then select save as, Fig:12 http://snipurl.com/19pif
Step 3
Then select Web Archive,single file(*.mht) fig:13 http://snipurl.com/19pii
This will save the page as a single file . You can rename it whatever you like or keep the original name.
Tip
"Look at the Save in box to see where you are saving it too".
If the web page has a lot of pages instead of saving each page individually you can use a web site copier to download the whole web site.
HTTrack is a good one .
Manual
http://www.httrack.com/html/index.html
DownLoad
http://www.httrack.com/page/2/en/index.html
http://www.httrack.com/
Just copy and paste the web site address into it and away it goes.
To download software to your computer ,it pays to get a program to do it for you.
These programs can resume downloads when your internet connection fails. Allow multiplie downloads etc. A good one is
Download Express
Features
HTTP, FTP, HTTPS protocol support
Cookies support
Very fast and reliable file retrieval from the Web and FTP sites
Maximum Internet connection bandwidth usage when loading several file parts simultaneously
HTTP and SOCKS Proxy support
Internet Explorer clicks interception
Checks downloaded files for viruses
Can operate in the background
The ability to resume broken downloads
Very easy to use More Info
http://www.metaproducts.com/mp/mpProducts_Detail.asp?id=18
Online user Manual with Screen Shots
http://www.metaproducts.com/mp/DE_concise.asp?id=18
Download
http://www.metaproducts.com/mp/MetaProducts_Download_Express.htm
When you first install it it asks you where you want to save your downloads to . point it too the folder you made in part 1.
Saving or downloading.
Step 1 We will learn how to save a image from the internet,
Go to http://snipurl.com/19jqe and right click on the image and select save picture as.
A dialog box should appear,
Fig: 9 http://snipurl.com/19peu
On the right hand side of where it says Save in you should see a downward pointing arrow, click on the downward pointing arrow and a drop down menu should appear,Fig: 10
http://snipurl.com/19pos
Select My Documents
At the bottom of the dialog box Click in the File Name box and name the file Duck
Then click Save.
click the start button then My Documents. now you should see the Image "Duck" you saved .
Go back to http://snipurl.com/19jqe.
Right click the image again and select Save Picture as "Now Find the Folder you created in part 1". In the Save in Field Click this folder when you find it. Name the File Duck 2 click Save.
Click the start button then My Computer go to the drive where you created the folder in Part 1 and open it.
You should have 2 Duck images in there "Duck & Duck2"
Now every time you save something . It should save to this folder.
Note
It always pays to keep an eye on this Dialog box "Save in" or "Look In". Just to make sure it is still pointing to the folder you made.
Tip.
If you happen to save a file and you can not find it. Save another file and take a note of where "Save in " or "Look in" is pointing too. This is where your lost file will be.
There are a lot of different ways you can save something to your computer.
For example you are looking at a Web Page in Internet explorer., and you want to keep the page so you can look at it later.
Step 1
Click File on the top menu bar, Fig:11 http://snipurl.com/19pi6
Step 2
Then select save as, Fig:12 http://snipurl.com/19pif
Step 3
Then select Web Archive,single file(*.mht) fig:13 http://snipurl.com/19pii
This will save the page as a single file . You can rename it whatever you like or keep the original name.
Tip
"Look at the Save in box to see where you are saving it too".
If the web page has a lot of pages instead of saving each page individually you can use a web site copier to download the whole web site.
HTTrack is a good one .
Manual
http://www.httrack.com/html/index.html
DownLoad
http://www.httrack.com/page/2/en/index.html
http://www.httrack.com/
Just copy and paste the web site address into it and away it goes.
To download software to your computer ,it pays to get a program to do it for you.
These programs can resume downloads when your internet connection fails. Allow multiplie downloads etc. A good one is
Download Express
Features
HTTP, FTP, HTTPS protocol support
Cookies support
Very fast and reliable file retrieval from the Web and FTP sites
Maximum Internet connection bandwidth usage when loading several file parts simultaneously
HTTP and SOCKS Proxy support
Internet Explorer clicks interception
Checks downloaded files for viruses
Can operate in the background
The ability to resume broken downloads
Very easy to use More Info
http://www.metaproducts.com/mp/mpProducts_Detail.asp?id=18
Online user Manual with Screen Shots
http://www.metaproducts.com/mp/DE_concise.asp?id=18
Download
http://www.metaproducts.com/mp/MetaProducts_Download_Express.htm
When you first install it it asks you where you want to save your downloads to . point it too the folder you made in part 1.
07 February, 2007
How to make a New Folder
This is of a series of Tutorials I am putting together to help a Couple of people who are new to computers and want to know how to do certain things . I will be trying to keep them simple and provide as many screen shots as possible . if you find a mistake or know of a easier way to do something or have a suggestion.
"Please feel free to leave a comment".
I am going to start of with
Part 1
Creating a Folder for all your Files .ie: anything you store or save on your computer
Part 2
Downloading and saving files. be it Pictures, Music ,Emails or just your notes etc.
part 3 will be a short one on the Quick Launch Bar to aid getting around your computer
Part 4 Shareza file sharing. Downloading Songs
Part 5 Email . Saving,Moving Store Folder. Forwarding etc.
-------------------------------------------------------------------------------------
Part: 1
This Tutorial is to try and explain how to make a Folder for storing all your files and Point windows to it.
This is most important for 2 reasons
N# 1 When you save or Download something you will be able to find it again
N# 2 "when" not if Windows ever crashes on you. you will be able to save your files easier.
Note:
Most computers hard drives have been parttioned into 2 separate areas one having the operating system. the other for your personal files.
The drive with the windows folder in it is the one you should avoid using if at all possible.
note to see The pictures ie: Fig:1 ,2, 3,4,5,6,7,8 etc scroll down this page.
Step 1.
click the start button.
Fig:1
Step 2.
click My computer
Fig:2
Step 3.
Double click your hard drive that you want to save all your downloaded or saved files in.
Fig: 3
On the File and Folder Tasks menu on the left click "Make a new Folder"
Name this Folder "DownLoads" or whatever pleases you.
Open this folder by double clicking on it.
Step: 4
We now have to configure this folder for the next step. At the very top of this folder There should be a Menu bar and a Address bar like the picture below.
fig: 5
If the address bar is not present , right click any where on the menu bar, Click the address bar so it is highlighted,
The address bar will appear under the menu bar. In this bar it should read D:\downloaded or whatever your Drive is named.
Fig:6
If this is not displayed click tools on the Menu Bar and select Folder Options,then View.
scroll down to "Display the full path in the address bar" Put a tick in the box beside it.
Fig :7
Step: 5
Click inside the address bar to highlight the address of the folder . Right click and select copy.
Step:6
Click the start button again and then Right Click My Docments and click Properties.
This will bring up a Dialog box as in Fig:6.
Right Click in the Target box to Highlight the address and click Paste.
Fig: 8
In the Move Documents box, click Yes to move your documents to the new location,
Now you have a folder where everything should be saved too. Which makes it Easier to Find things. In this folder you will find that windows has moved My Pictures,
My Music,My Video Folders. you can now make new folders for anything you want. ie: HouseHold, Car, Bank etc etc.Then make new folders within these folders for example.
In the Household Folder you can make new folders and name the Rates, Phone, power, etc etc.
Note you can Name this folder and any other folder anything you want.
When you first create the folder name it straight away when it is Highlighted or later by right clicking it and selecting rename.
Next Part 2
Downloading and saving .
"Please feel free to leave a comment".
I am going to start of with
Part 1
Creating a Folder for all your Files .ie: anything you store or save on your computer
Part 2
Downloading and saving files. be it Pictures, Music ,Emails or just your notes etc.
part 3 will be a short one on the Quick Launch Bar to aid getting around your computer
Part 4 Shareza file sharing. Downloading Songs
Part 5 Email . Saving,Moving Store Folder. Forwarding etc.
-------------------------------------------------------------------------------------
Part: 1
This Tutorial is to try and explain how to make a Folder for storing all your files and Point windows to it.
This is most important for 2 reasons
N# 1 When you save or Download something you will be able to find it again
N# 2 "when" not if Windows ever crashes on you. you will be able to save your files easier.
Note:
Most computers hard drives have been parttioned into 2 separate areas one having the operating system. the other for your personal files.
The drive with the windows folder in it is the one you should avoid using if at all possible.
note to see The pictures ie: Fig:1 ,2, 3,4,5,6,7,8 etc scroll down this page.
Step 1.
click the start button.
Fig:1
Step 2.
click My computer
Fig:2
Step 3.
Double click your hard drive that you want to save all your downloaded or saved files in.
Fig: 3
On the File and Folder Tasks menu on the left click "Make a new Folder"
Name this Folder "DownLoads" or whatever pleases you.
Open this folder by double clicking on it.
Step: 4
We now have to configure this folder for the next step. At the very top of this folder There should be a Menu bar and a Address bar like the picture below.
fig: 5
If the address bar is not present , right click any where on the menu bar, Click the address bar so it is highlighted,
The address bar will appear under the menu bar. In this bar it should read D:\downloaded or whatever your Drive is named.
Fig:6
If this is not displayed click tools on the Menu Bar and select Folder Options,then View.
scroll down to "Display the full path in the address bar" Put a tick in the box beside it.
Fig :7
Step: 5
Click inside the address bar to highlight the address of the folder . Right click and select copy.
Step:6
Click the start button again and then Right Click My Docments and click Properties.
This will bring up a Dialog box as in Fig:6.
Right Click in the Target box to Highlight the address and click Paste.
Fig: 8
In the Move Documents box, click Yes to move your documents to the new location,
Now you have a folder where everything should be saved too. Which makes it Easier to Find things. In this folder you will find that windows has moved My Pictures,
My Music,My Video Folders. you can now make new folders for anything you want. ie: HouseHold, Car, Bank etc etc.Then make new folders within these folders for example.
In the Household Folder you can make new folders and name the Rates, Phone, power, etc etc.
Note you can Name this folder and any other folder anything you want.
When you first create the folder name it straight away when it is Highlighted or later by right clicking it and selecting rename.
Next Part 2
Downloading and saving .


19 January, 2007
Comet
Monday the 4th of jan 2007
Comet still visible in our skys.
Another site with pictures from all over the world.
http://spaceweather.com:80/comets/gallery_mcnaught.php
more on the comet. Did'nt have to wander across the road last night , Could see it clearly from our front yard. Hardly a cloud anywhere
Found this nz site with pictures
http://www.doggitt.com/comets.htm
Wandered over the road last night to get a better view of the mcnaught Comet , Bit cloudy but still able to see it quite clearly as the clouds moved off.
This comet is supposed to be one of the the most visible comets for about 40 years . Looking in a southwest direction in the sky.

More info here
http://www.space.com/spacewatch/070112_ns_comet_mcnaught.html
Nz
http://www.rasnz.org.nz/
Nz Newspaper
http://www.stuff.co.nz/stuff/dailynews/3929492a11.html
Image Gallery
http://spaceweather.com/comets/gallery_mcnaught_page9.htm
More images here
http://www.nzherald.co.nz/section/1/story.cfm?c_id=1&objectid=10419869
19.01.07
Comet still visible in our skys.
Another site with pictures from all over the world.
http://spaceweather.com:80/comets/gallery_mcnaught.php
more on the comet. Did'nt have to wander across the road last night , Could see it clearly from our front yard. Hardly a cloud anywhere
Found this nz site with pictures
http://www.doggitt.com/comets.htm
Wandered over the road last night to get a better view of the mcnaught Comet , Bit cloudy but still able to see it quite clearly as the clouds moved off.
This comet is supposed to be one of the the most visible comets for about 40 years . Looking in a southwest direction in the sky.

More info here
http://www.space.com/spacewatch/070112_ns_comet_mcnaught.html
Nz
http://www.rasnz.org.nz/
Nz Newspaper
http://www.stuff.co.nz/stuff/dailynews/3929492a11.html
Image Gallery
http://spaceweather.com/comets/gallery_mcnaught_page9.htm
More images here
http://www.nzherald.co.nz/section/1/story.cfm?c_id=1&objectid=10419869
19.01.07
15 January, 2007
Hydrabad
New section added to Hometown.
This is the ship Hydrabad that was wrecked of Waitarere Beach. Was down at that beach today could'nt find it any where. Must be covered in sand again. I remember going to the beach at waitarere when younger and climbing all over it. It was like the wreckage picture then.
this was in the early 60's.
The Hydrabad
http://digital.natlib.govt.nz/get/22461?profile=access
was Built in 1865 at Port Glasgow, Scotland, and was owned by Stephens and Sons, London
Captain Holmwood
The Hydrabad was a square-rigged ship with three masts.
Her official number was 30642 of 1865.'
Built of Lowmoor iron,
Lenght 229.5 feet [69.9 metres] long,
Beam 37.2 feet [11.2 metres]
Depth was 23.2 feet [7 metres]
1350 tons register
She had 2 holds.
Her figurehead was Hindu warrior, with a colourful turban, sash and flowing white robe, and a black bushy beard. His left hand was gripping a sword. This ended up at foxton beach in someones garden but unfortunatley its gone now
A picture of this can be seen here http://horowhenuahistory.library.org.nz/exhibit1/e10200b.htm
A little history on what happened to the ship.
On 24 June 1878 on route to Adelaide, Australia from Lyttelton, NZ.
the ship struck a severe storm, After battling the storm she ended up of the horowhenua coast and could'nt get back out to sea. The captain drove the vessel onto the beach at Waitarere.There was no loss of life
There were two attempts, in November 1878 and 7 Jan 1879 to refloat the ship; these did'nt succed
The vessel was abandoned following fire that was so fierce that the hull planks were buckled. She was insured for £15,000 and her cargo for £24,500.
Picture of the Wreckage
http://digital.natlib.govt.nz/get/11916?profile=access
Successive storms have left the wreck well above high water mark. The wreck is now covered with sand, and is occasionally uncovered and recovered through storm and wind action.
There has been talk of erecting a memorial to the ship ,but unsure if any thing has been done??
This is the ship Hydrabad that was wrecked of Waitarere Beach. Was down at that beach today could'nt find it any where. Must be covered in sand again. I remember going to the beach at waitarere when younger and climbing all over it. It was like the wreckage picture then.
this was in the early 60's.
The Hydrabad
http://digital.natlib.govt.nz/get/22461?profile=access
was Built in 1865 at Port Glasgow, Scotland, and was owned by Stephens and Sons, London
Captain Holmwood
The Hydrabad was a square-rigged ship with three masts.
Her official number was 30642 of 1865.'
Built of Lowmoor iron,
Lenght 229.5 feet [69.9 metres] long,
Beam 37.2 feet [11.2 metres]
Depth was 23.2 feet [7 metres]
1350 tons register
She had 2 holds.
Her figurehead was Hindu warrior, with a colourful turban, sash and flowing white robe, and a black bushy beard. His left hand was gripping a sword. This ended up at foxton beach in someones garden but unfortunatley its gone now
A picture of this can be seen here http://horowhenuahistory.library.org.nz/exhibit1/e10200b.htm
A little history on what happened to the ship.
On 24 June 1878 on route to Adelaide, Australia from Lyttelton, NZ.
the ship struck a severe storm, After battling the storm she ended up of the horowhenua coast and could'nt get back out to sea. The captain drove the vessel onto the beach at Waitarere.There was no loss of life
There were two attempts, in November 1878 and 7 Jan 1879 to refloat the ship; these did'nt succed
The vessel was abandoned following fire that was so fierce that the hull planks were buckled. She was insured for £15,000 and her cargo for £24,500.
Picture of the Wreckage
http://digital.natlib.govt.nz/get/11916?profile=access
Successive storms have left the wreck well above high water mark. The wreck is now covered with sand, and is occasionally uncovered and recovered through storm and wind action.
There has been talk of erecting a memorial to the ship ,but unsure if any thing has been done??
Subscribe to:
Posts (Atom)